Repurposed Denim Bibs

27 06 2011

What to do with old jeans? You could patch them and get another couple months out of them. You could put them in the Goodwill pile. Or, you could repurpose them into something else.

These are my first pair of post pregnancy jeans from the Gap. I wore these suckers out. Mostly, because they were the only pair of jeans that fit comfortably. Before this project, they had three different holes in them. Holes in place where you don’t want holes in your jeans. It was time to let them go.

When trying to decide what to do with these, I started scouring the internet. Repurposing is a trendy thing these days what with the economy still being in the tank and people becoming more environmentally aware. There were a lot of choices. But, when I saw this tutorial, I knew I had found a winner. I wanted to make something for my new nephew, Luke, and thought this would be perfect for the little guy.

First, cut off the legs of your jeans.

Do us all a favor. Do not under any circumstances wear the cut-offs. Unless you are actually Daisy Duke. Or look very much like her. In fact, be sure to ask a stranger if you look like Daisy Duke before even thinking about wearing these.

Use a seam ripper or scissors to open up one leg of the jeans. Then, trace a bib on the inside of the opened leg. Be sure to choose a bib you like the size and shape of. I sort of eyeballed it and traced around the bib about 1/2 inch larger than the bib actually was, leaving me with some extra room for seam allowances. Cut out your bib shape.

I also wanted something to decorate the front and back of the bib, but I didn’t want to buy anything else. (Read: I was too lazy to go back out to the fabric store.) So, I went upstairs and started rifling through Olivia’s drawers. I came upon a stack of receiving blankets I had never even used. One even had an applique on it. Done and done.

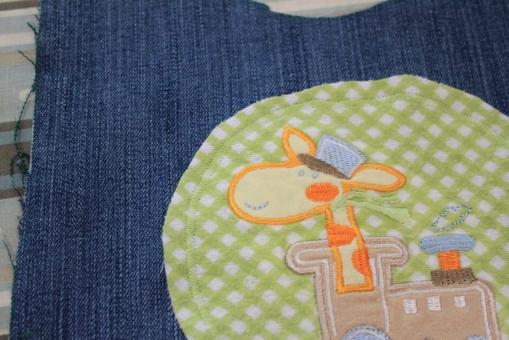
Use the denim bib piece as a template for the backing. If you are using some sort of decoration, cut that to the shape of your choice. I used a compass to create the circle shape around the giraffe. Press all the pieces so they lay nice and flat.

Then, I used some Stitch Witchery to hold the applique piece in place for sewing. You could also just pin it.

Stitch around the applique. I used a zigzag stitch with a 1/4″ seam allowance.

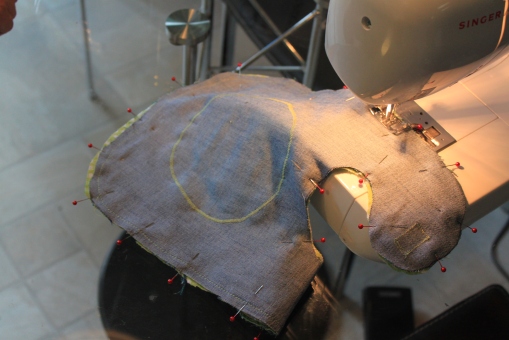
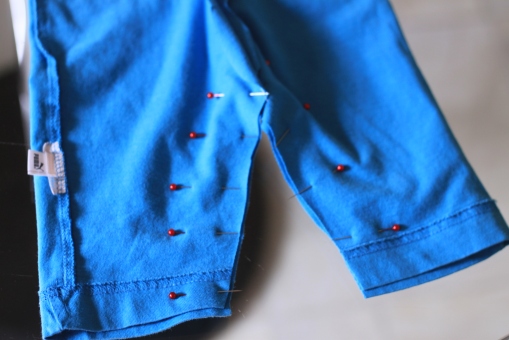
To fasten your bib, you have a few different choices. Velcro, ribbon, buttons, snaps, etc. I think having to tie a bib on a wiggly baby is rather annoying and buttons and snaps require more expertise than I have at the moment, so I went with Velcro. Here’s the problem. I didn’t take one stinking picture of the Velcro part of this process. You’re just going to have to trust me that it’s there. Ooh! You can see in the above two pictures where I marked and pinned the Velcro. Something is better than nothing, right?

In any case, sew on your Velcro before binding the two sides of the bib. Be sure to place one piece on the denim and the other piece on your backing fabric. They should be placed in such a way that they will actually match up when you go to fasten the bib. Since this was the first time I worked with Velcro, this took me longer than I would like to admit.

Once the Velcro is attached, pin your two bib pieces together and press. Then, sew around the edges with a straight stitch leaving a 1/2″ seam allowance. Don’t forget to leave about a 3″ opening at the bottom of the bib to turn everything right side out.

I forgot to leave the opening at the bottom, so mine was at the top in the neckline. Ugh.

Trim any excess fabric to 1/4″. Turn your bib right side out and see how everything is laying out. Use the blunt end of a chopstick or crochet hook to gently push the corners out. My bib looked a little lumpy around the corners and wasn’t laying as flat as I liked, so I turned it back to the wrong side and cut some small slits at each corner.

Once your bib lays the way you want it to, press it again. Be sure to tuck under the rough edges of your opening. Topstitch around the entire bib leaving a 1/4″ seam allowance. Backstitch when you meet up with where you started.

Here’s the finished bib.

Note: Do not for one second think that I did this by myself. This was a project my mom walked me through during her visit. It would be a hot mess without her guidance.

List of supplies:
Jeans
Fabric for backing
Applique (optional)
Velcro
Pins
Stitch Witchery (optional)
Sewing machine
Thread
Iron
Ironing Board


From Fat Quarters to Cloth Napkins

23 06 2011

One of the many reasons I was excited for my mom to come visit is that she knows how to sew. I do not know how to sew. I had borrowed a sewing machine from my friend, Jenn, and aside from some baby pants, the machine hadn’t gotten much use. I didn’t know where to start or what to make. So, the sewing machine gathered dust in the closet.

My mom has sewed for as long as I can remember. Over the years she has made me baby clothes, a pillow, and recovered a couch with sheets. They were Ralph Lauren sheets. That couch was awesome.

For my mom, it seemed like sewing came in waves. She would get into it for a while and then lose interest or get busy with three kids other things.

Then I got pregnant. Then my sister got pregnant. My mom has been in a sewing frenzy ever since. Nursing covers, car seat covers, burp cloths, crib sheets…if it’s baby related she has probably sewn it.

With all this recent sewing experience under her belt, it was my hope that her visit would turn into a sort of Sewing 101. Maybe she could show me a few things so I felt like I had my feet on the ground with sewing and could proceed without her peering over my shoulder.

And that, my friends, is exactly what happened.

On our way out of Rocky Mountain National Park, we stopped at a quilting shop in Lyons. While browsing through the fabric, I started poking around in the bins of fat quarters. A fat quarter is a quarter yard of fabric that is cut the “fat” or wide way instead of the long way. I wondered aloud if I could use a stack of fat quarters to make some cloth napkins. Nothing fancy. Just some everyday napkins. Mom agreed that they would work well and that cloth napkins would be a good first project.

I chose this fabric. It is Cocoa by Monaluna for Robert Kaufman.

Once we got the fabric home, the first task was to wash it. You always want to wash your fabric before you do anything with it so that you aren’t foiled by shrinkage after creating your sewing masterpiece. Because dinner napkins are usually 18 or 20 inches square, we needed to wash the fabric to determine exactly what size the final napkins would be.

As we were unfolding the fat quarters, Mom noticed that some of the unfinished edges were already fraying.

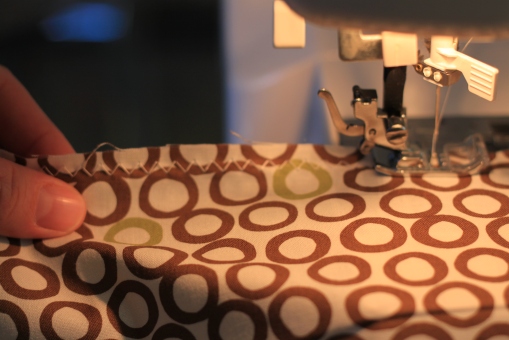
Before we threw the fabric in the laundry, we ran a zigzag stitch as close to the unfinished edges as possible. This would help to conserve as much of the fabric as possible because once the cloth frayed to the stitch line, it would stop and not fray any farther.

This is what it looked like after it came out of the laundry.

See how much it frayed?

The next task was to “square” the fabric and trim it to the final size before sewing. I should have taken more pictures of this, but I’ll try and explain it as clearly as possible. First, fold your fabric in half and match up the opposing sides. Most likely the corners will be uneven.

Then, use a cereal box straight edge ruler as a guide and trim off the uneven corners. Flip the fabric over and trim the uneven corners on the other side. Repeat the process for the other two edges. You will need to open your fabric and fold it in half the other way.  Here’s a tutorial on squaring fabric if my explanation isn’t clear.

Once all the pieces of fabric were square, we measured what we had. The unfinished napkins measured about 18 inches. We figured my finished napkins would be about 17 inches square. We trimmed the napkins again so they were all the same size. Here’s where we had a bit of a breakdown and I learned a major sewing rule.

Repeat after me: Measure twice, cut once.

Someone, who shall remain nameless, did not measure accurately so our unfinished napkins ended up being 16 by 16. I blame grandchild euphoria. And, really, it doesn’t matter.

Repeat after me: We are not entering them in a contest.

Although these were going to be simple every day napkins, I still wanted them to look nice so we decided to do mitered corners. Fold your fabric right sides together into a triangle shape. Line up one of the bottom corners with the edge of your cutting mat.

Measure in from the edge and mark where you want depending on how deep your hem will be. We chose an inch since our napkins were already going to be on the small side. Pin the corner. Flip the fabric and mark the other corner.

Open up the napkin, fold it in half the other way and repeat the process for the other two corners.

Run a stitch from the fold to nearly the edge. Trim off the corner.

Turn your fabric right side out and use the blunt edge of a chopstick or crochet hook to get those corners turned all the way out. Then, fold your hem. We folded a 1/4 inch and a 1/4 inch again and pinned.

Press the hems.

Sew a straight stitch all the way around the napkin. Backstitch a few stitches when you meet up to the spot where you began.

Pat yourself on the back and do a little happy dance, you just made yourself a napkin!

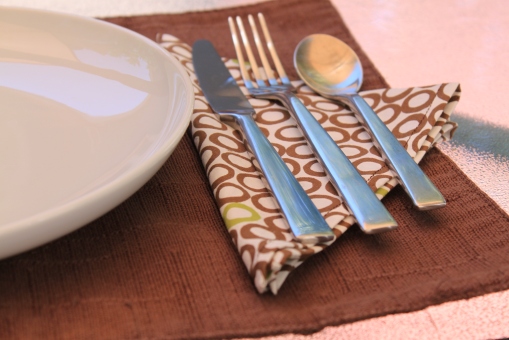
Now, go set the table so you can see how awesome they’ll look!

UPDATED: I just wanted to add that the total cost for this project was around $17 for 8 napkins. The cheapest patterned napkins on sale at Crate and Barrel are $3.95 each. So, not only is this “greening” up our house, we also saved about $15. Holla!


My First Sewing Project aka Baby Pants

21 03 2011

When I was in junior high, we had an hour of electives. Every quarter your elective would change. Spanish, keyboarding, computers, shop, and home ec were all choices. Do they even have home ec in middle school or high school anymore? I’m pretty sure between home ec and keyboarding, I’m dating myself.

Anyway, when I took home ec, we had to do a sewing project. Although I had never sewed before, I really enjoyed making a cat pillow for my little sister. A stuffed cat. Yikes. At least she liked it.

I come from a family of crafters. My Granny sewed, crocheted, embroidered and made all kinds of things out of beads. My mom sews and does cross stitch. My aunt quilts. My sister knits and crochets. That home ec class didn’t really inspire me to take up crafting at the time, but there has been a lot of crafting influence throughout my life.

Additionally, over the last few years, a crafting movement has emerged. Sites like Etsy allow crafters to sell their wares online and countless bloggers post their projects and tutorials for all to see. What I love about all of this is the ability to make things for yourself and reuse items that would otherwise be tossed in the donation bag or the trash. So, after borrowing a sewing machine from a friend, I started stumbling for my first sewing project. I wanted something easy that would allow me to be successful from the start.

At Rookie Moms, I found a tutorial for making baby pants from an old t-shirt. Tim had just cleaned out his dresser, so I had a pile of t-shirts just waiting to be repurposed. During nap time one day, I decided to dive in. Here’s how to make them….

First, choose the t-shirts you want to use. I didn’t use anything too thread bare or that was a funky color I didn’t think Olivia would wear.

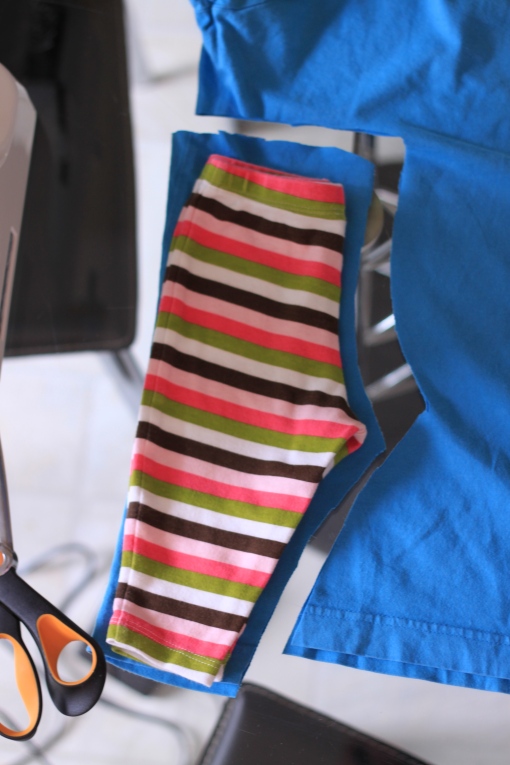
Then, grab a pair of baby pants your child currently wears to use as a pattern.

After setting up the sewing machine, gather the other materials you will need. Scissors, thread, pins, and elastic.

One day, maybe I'll have a place to work other than the kitchen table...a girl can dream!

Lay out the t-shirt on a flat surface. Then fold the baby pants in half lengthwise and be sure to pull out the crotch. Lay the baby pants on top of the t-shirt, lined up with either the left or right side. Cut around the shape of the baby pants, leaving 1/2 inch of extra fabric. I wasn’t paying very close attention and could have done better with this step.

Next, take the piece of t-shirt that you just cut out and flip it over and line it up with the other side of the shirt. Cut around the edges. Since you already allowed for a 1/2 inch extra the first time around, you don’t need to do that here.

You now have the front and back of the pants. Lay them out flat and line them up so the outsides are facing each other and the existing seams are aligned. Then, pin along the edges that will be the waist to crotch seams and sew. (Note: I’m not really sure why my two pieces weren’t the exact same size or if I am pinning correctly. Feel free to comment and offer advice. Obviously, I need it. :))

Next, reposition the pants so you can see the legs. Do this by pulling on the original shirt seams and laying the pants flat. The seams you just sewed should now be in the middle of the pants and you should see two legs. Make sense? Now, pin along the inseams and stitch those.

All you have left to do is the waistband. Little babies who are not yet mobile probably don’t need elastic. Bigger babies do or they will lose their britches. Fold down the waistband and stitch nearly all the way around. Leave yourself a little hole to insert the elastic. I measured out the elastic by just wrapping a portion around the pattern pants. Run the elastic through the waistband, stitch the ends together, and stitch the waistband closed.


And, voila! You have a pair of baby pants!

Now, go put them on the nearest cute baby.

There are a lot of things wrong with these pants, but for my first sewing project since junior high school, I’m pretty pleased with myself. If you decide to make these, please leave a comment and let us know how it went.