What to do with old jeans? You could patch them and get another couple months out of them. You could put them in the Goodwill pile. Or, you could repurpose them into something else.
These are my first pair of post pregnancy jeans from the Gap. I wore these suckers out. Mostly, because they were the only pair of jeans that fit comfortably. Before this project, they had three different holes in them. Holes in place where you don’t want holes in your jeans. It was time to let them go.
When trying to decide what to do with these, I started scouring the internet. Repurposing is a trendy thing these days what with the economy still being in the tank and people becoming more environmentally aware. There were a lot of choices. But, when I saw this tutorial, I knew I had found a winner. I wanted to make something for my new nephew, Luke, and thought this would be perfect for the little guy.
First, cut off the legs of your jeans.
Do us all a favor. Do not under any circumstances wear the cut-offs. Unless you are actually Daisy Duke. Or look very much like her. In fact, be sure to ask a stranger if you look like Daisy Duke before even thinking about wearing these.
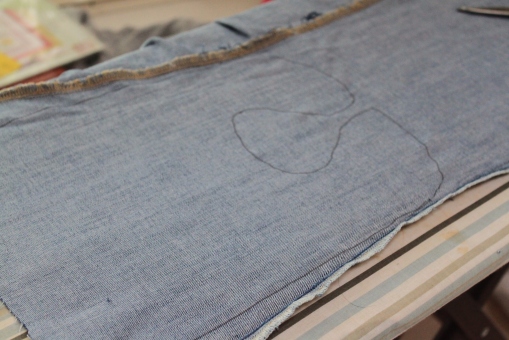
Use a seam ripper or scissors to open up one leg of the jeans. Then, trace a bib on the inside of the opened leg. Be sure to choose a bib you like the size and shape of. I sort of eyeballed it and traced around the bib about 1/2 inch larger than the bib actually was, leaving me with some extra room for seam allowances. Cut out your bib shape.
I also wanted something to decorate the front and back of the bib, but I didn’t want to buy anything else. (Read: I was too lazy to go back out to the fabric store.) So, I went upstairs and started rifling through Olivia’s drawers. I came upon a stack of receiving blankets I had never even used. One even had an applique on it. Done and done.
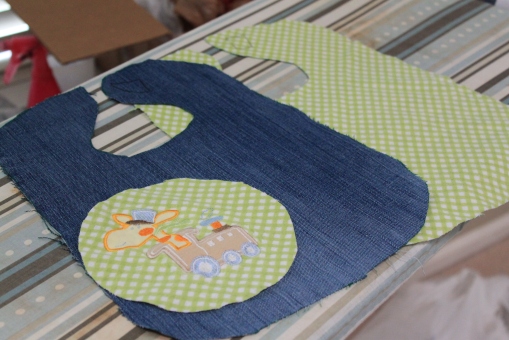
Use the denim bib piece as a template for the backing. If you are using some sort of decoration, cut that to the shape of your choice. I used a compass to create the circle shape around the giraffe. Press all the pieces so they lay nice and flat.
Then, I used some Stitch Witchery to hold the applique piece in place for sewing. You could also just pin it.
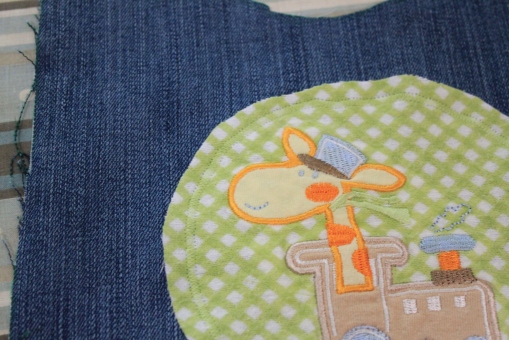
Stitch around the applique. I used a zigzag stitch with a 1/4″ seam allowance.
To fasten your bib, you have a few different choices. Velcro, ribbon, buttons, snaps, etc. I think having to tie a bib on a wiggly baby is rather annoying and buttons and snaps require more expertise than I have at the moment, so I went with Velcro. Here’s the problem. I didn’t take one stinking picture of the Velcro part of this process. You’re just going to have to trust me that it’s there. Ooh! You can see in the above two pictures where I marked and pinned the Velcro. Something is better than nothing, right?
In any case, sew on your Velcro before binding the two sides of the bib. Be sure to place one piece on the denim and the other piece on your backing fabric. They should be placed in such a way that they will actually match up when you go to fasten the bib. Since this was the first time I worked with Velcro, this took me longer than I would like to admit.
Once the Velcro is attached, pin your two bib pieces together and press. Then, sew around the edges with a straight stitch leaving a 1/2″ seam allowance. Don’t forget to leave about a 3″ opening at the bottom of the bib to turn everything right side out.
I forgot to leave the opening at the bottom, so mine was at the top in the neckline. Ugh.
Trim any excess fabric to 1/4″. Turn your bib right side out and see how everything is laying out. Use the blunt end of a chopstick or crochet hook to gently push the corners out. My bib looked a little lumpy around the corners and wasn’t laying as flat as I liked, so I turned it back to the wrong side and cut some small slits at each corner.
Once your bib lays the way you want it to, press it again. Be sure to tuck under the rough edges of your opening. Topstitch around the entire bib leaving a 1/4″ seam allowance. Backstitch when you meet up with where you started.
Here’s the finished bib.
Note: Do not for one second think that I did this by myself. This was a project my mom walked me through during her visit. It would be a hot mess without her guidance.
List of supplies:
Jeans
Fabric for backing
Applique (optional)
Velcro
Pins
Stitch Witchery (optional)
Sewing machine
Thread
Iron
Ironing Board


